September 12, 2016
Angular 2 Animate Example: Creating a Sliding Side Navigation Tutorial
#1 Project Setup
Animations in Angular 2 are probably easier than you think. In this tutorial we will create a simple side navigation that will leave and enter the screen from the right side. We will use Angular-CLI and TypeScript but you should also be able to adopt the steps to any other project like Ionic 2.
First of all install the latest version of the Angular-CLI. Currently the project is under heavy development. Please make sure to get at least version 1.0.0-beta.11-webpack.8 or higher. To print out your current version use ng --version.
If your version is older, remove it, clear the npm cache and reinstall with the following commands:
|
1 2 3 |
npm uninstall -g angular-cli npm cache clean npm install -g angular-cli@1.0.0-beta.11-webpack.8 |
Right now it is required to give the full version in the npm install command, otherwise you will get an old version! You can check for the latest version number here.
#2 Required Markup
Since our toolchain is now set up, lets kick of a fresh project with Angular-CLI and add the required markup for our example.
|
1 2 3 |
ng new angular-2-animate-tutorial cd angular-2-animate-tutorial ng serve |
Your app is now running at http://localhost:4200.
httOpen a new console window and create the menu component:
|
1 |
ng generate component menu |
Now include the generated menu to your app:
|
1 2 3 4 5 |
<h1> {{title}} </h1> <app-menu></app-menu> |
Add some menu points to the menu:
|
1 2 3 4 5 6 7 8 |
<ul> <li>Menu Item</li> <li>Menu Item</li> <li>Menu Item</li> <li>Menu Item</li> <li>Menu Item</li> <li>Menu Item</li> </ul> |
And some styles:
|
1 2 3 4 5 6 7 8 9 10 11 12 13 14 15 16 17 18 19 20 21 |
:host { background: #1a2580; color: #fff; position: fixed; left: auto; top: 0; right: 0; bottom: 0; width: 20%; min-width: 250px; z-index: 9999; font-family: Arial, "Helvetica Neue", Helvetica, sans-serif; } ul { font-size: 18px; line-height: 3; font-weight: 400; padding-top: 50px; list-style: none; } |
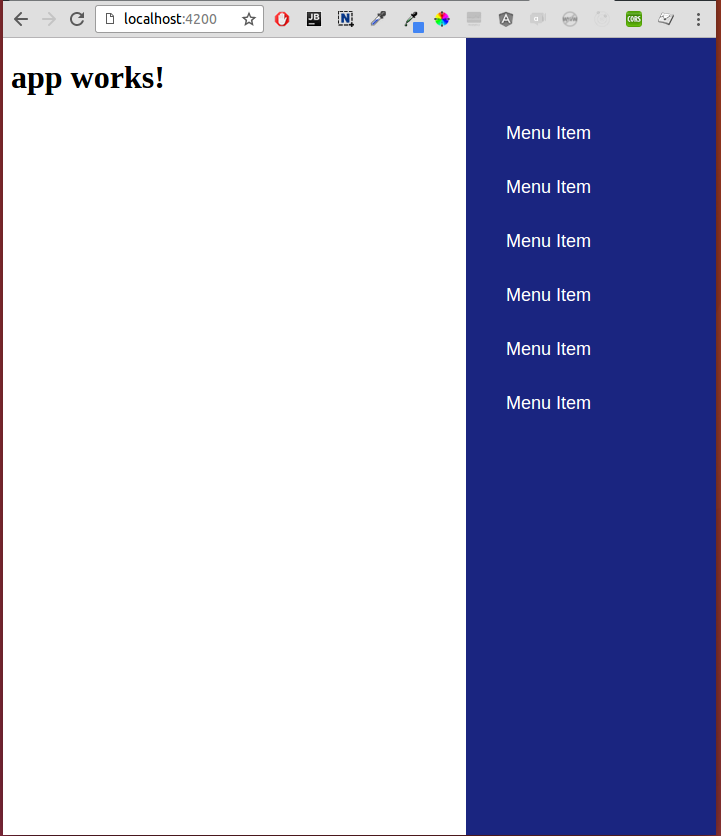
Your output should now look like mine:
Now we need a toggle button:
|
1 2 3 4 5 6 7 8 9 |
<button (click)="toggleMenu()" class="hamburger"> <span>toggle menu</span> </button> <h1> {{title}} </h1> <app-menu></app-menu> |
|
1 2 3 4 5 6 7 8 9 10 11 12 13 14 15 16 17 18 19 20 21 22 23 24 25 26 27 28 29 30 31 32 33 34 35 36 37 38 39 40 41 42 43 44 45 |
.hamburger { display: block; position: relative; overflow: hidden; margin: 0; padding: 0; width: 96px; height: 96px; font-size: 0; text-indent: -9999px; cursor: pointer; outline: none; background: none; border: 0; } .hamburger span { display: block; position: absolute; top: 44px; left: 18px; right: 18px; height: 8px; background: #1a2580; } .hamburger span::before, .hamburger span::after { display: block; position: absolute; left: 0; width: 100%; height: 8px; background-color: #1a2580; content: ""; } .hamburger span::before { top: -20px; } .hamburger span::after { bottom: -20px; } |
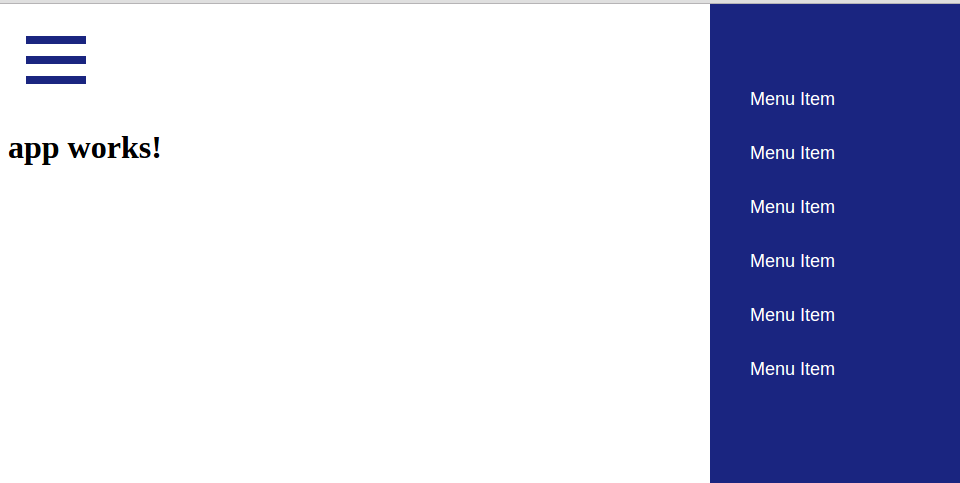
Result:
#3 Animations
This completes our dummy markup. Now it is time to get started with the actual animation. First of all we need to declare some imports in the component responsible for the animation. This will be our app.component. And create the toggleMenu method.
|
1 2 3 4 5 6 7 8 9 10 11 12 13 14 |
import {Component, trigger, state, style, transition, animate} from '@angular/animations'; @Component({ selector: 'app-root', templateUrl: './app.component.html', styleUrls: ['./app.component.css'] }) export class AppComponent { title = 'app works!'; toggleMenu() { } } |
Since our side navigation is located on the right side of the screen we want it be hidden by default and then slide in from the right side on toggle. There is no need to use *NgIf or something else. We simply move the navigation off the canvas to the right side by using transform:translate. On toggle the navigation will slide back in by resetting the transform to zero.
The animation is declared in the component decorator in app.component.ts and then applied to the planned HTML element using the [@] syntax.
Add the animation definition:
|
1 2 3 4 5 6 7 8 9 10 11 12 13 14 15 16 17 18 19 20 21 22 23 24 25 26 |
import {Component, trigger, state, style, transition, animate} from '@angular/animations'; @Component({ selector: 'app-root', templateUrl: './app.component.html', styleUrls: ['./app.component.css'], animations: [ trigger('slideInOut', [ state('in', style({ transform: 'translate3d(0, 0, 0)' })), state('out', style({ transform: 'translate3d(100%, 0, 0)' })), transition('in => out', animate('400ms ease-in-out')), transition('out => in', animate('400ms ease-in-out')) ]), ] }) export class AppComponent { title = 'app works!'; toggleMenu() { } } |
Now we need a variable that holds the current state of the animation (‘in’ or ‘out’). This will be later toggled. The initial state should be ‘out’ in order to hide the navigation by default. Also we are adding now the logic of the toggleMenu method, it will simply toggle the states value.
|
1 2 3 4 5 6 7 8 9 10 11 12 13 14 15 16 17 18 19 20 21 22 23 24 25 26 27 28 29 |
import {Component, trigger, state, style, transition, animate} from '@angular/animations'; @Component({ selector: 'app-root', templateUrl: './app.component.html', styleUrls: ['./app.component.css'], animations: [ trigger('slideInOut', [ state('in', style({ transform: 'translate3d(0, 0, 0)' })), state('out', style({ transform: 'translate3d(100%, 0, 0)' })), transition('in => out', animate('400ms ease-in-out')), transition('out => in', animate('400ms ease-in-out')) ]), ] }) export class AppComponent { title = 'app works!'; menuState:string = 'out'; toggleMenu() { // 1-line if statement that toggles the value: this.menuState = this.menuState === 'out' ? 'in' : 'out'; } } |
That’s pretty much it. Last step is to add the animation to the component call in our HTML markup using the already mentioned @ syntax. The first part matches the animations name and the given parameter is the value (‘out’ or ‘in’) from our component.
|
1 |
<app-menu [@slideInOut]="menuState"></app-menu> |
Before you ship this to production make sure to have the webanimations polyfill included, e.g. by adding this to your index.html:
|
1 |
<script src="https://cdnjs.cloudflare.com/ajax/libs/web-animations/2.2.2/web-animations.min.js"></script> |
#4 Final Result:
You can find the full code here:
Full Code at Github
Example Demo


This is awesome thank you!! I just updated my app with it 🙂
http://parlaybuddy.razartech.com/
man, one nice app you got there, great job. did you angular 2 to create that?
Could you please share the logic how to hide the navbar and route to the page when I click on the nav menu
Can you guide me how to login with facebook using Angular Js 2????
Works great. I have a left and right div that now slide in and out. Now I’m just trying to figure out how to have my main middle content flex div expand when I hide the side navs.
Have anyone got flexible component that expands and contracts while using sidenav
Changing the Contents width is generally a bad idea. Since this affects all elements like paragraphs and so on. It is not only a performance nightmare but also the change of width will result in an unsightly transformation of each content element. Change of line breaks etc.
Anyway you should be able to apply the same animation trigger to your content element as well. Then you are able to create another transformation that manipulates the content element. Other variant would be to use flexbox.
Hi,
How to Make it slide from left side of the screen to right side
How did you get this to come up on the left side of the screen?
How did you get your left side working. thanks
hello how can i change the position of the menu to the left side and animate it from left to right. thanks
Great article. How do you close the menu once a menu item has been selected?
Thanks.
use (click) binding to call a method in your component. The method triggers this.router.navigate([“xx”]) and this.toggleMenu();
Sweet, thanks. I’ll give this a shot.
I tried calling this.toggleMenu(); Here is my html: Contacts. But take time to load, I mean it is loading like a new page, not like an AJAX (quick loading)
How can I detect when component is not changed but data is. My goal is to change every 5 seconds between two pages which are like hero/0 and hero/1. Animation is working when I click panel link but when page is changed from timer page is changed without animation.
Sorry wrong page
hi how can i change te position of the menu to te left side and animate it from left to right
Even i need to know how.
Has anyone gotten the menu to be on the left side? If so how did you do this?
Hi, Thanks for your great article. Simple, clean, well explained, that exactly what I need. Cheers!
hi, thanks for giving nice tutorial it’s very helpful.
It is giving me error – Please include either “BrowserAnimationsModule” or “NoopAnimationsModule” in your application. I have added them in my app.module.ts
import { BrowserAnimationsModule } from ‘@angular/platform-browser/animations’;
imports: [
BrowserModule,
FormsModule,
HttpModule,
RouterModule.forRoot(appRoutes),
BrowserAnimationsModule
],
and installed npm install @angular/animations –save
done everything but error is still there
Same error…
@saurabh & @AshGoTheKey:
I was having the same error message show up- here is what I did:
1.) In ‘app.component.ts’, the author imports { trigger, state, style, transition, animate} from ‘@angular/core. According to the official docs, they should be imported from ‘@angular/animations.’
(https://angular.io/guide/animations for reference)
2.) Ensure that all of the logic is in ‘app.component.ts’, and that none of it is in menu.component.ts ( I made this mistake initially.) Only the menu.component.css and menu.component.html files should be modified in he menu folder.
Hope this helps.
Thanks TNR. This article was written when animation was still part of @angular/core. I’ve updated the information imports.
Hi
I am getting below URL.
ERROR in F:/xampp/htdocs/furrytails-web-app/src/app/app.component.ts (1,9): Modu
le ‘”F:/xampp/htdocs/furrytails-web-app/node_modules/@angular/animations/animati
ons”‘ has no exported member ‘Component’.
This sample is not running on Angular 4.
Can you upgrade the sample for Angular 4?
It is running for angular4
Thanks, for this one.
Hello, is ti possbile to call toggleMenu, inside navigation, i have X button inside menu to close the nav. Only problem is thta (click)=’toggleMenu’ does not work inside component menu?
Sure but you have to create an output event emitter in the menu component. On your button you call .emit method of the created event emitter.
Then in your AppComponent:
Maybe you can extend your post with this solution?
Hi, thanks for the tutorial! The animation works for me but the ease-in-out transition has no effect. I’m using Chrome so I don’t need the polyfill. Any suggestion?
I want to close the navigation on clicking outside the navigation area please help me with this
Hi, thanks for the tutorial!
To change the position of the menu to the left side and animate it from left to right do following changes
1) menu.css
:host {
background:#2eafe5;
color: #fff;
position: fixed;
left: auto;
top: 0;
left: 0;
bottom: 0;
width: 20%;
min-width: 250px;
z-index: 2;
font-family: Arial, “Helvetica Neue”, Helvetica, sans-serif;
}
ul {
font-size: 18px;
line-height: 3;
font-weight: 400;
padding-top: 50px;
list-style: none;
}
2) app.component.css :
import {Component, trigger, state, style, transition, animate} from ‘@angular/animations’;
@Component({
selector: ‘app-root’,
templateUrl: ‘./app.component.html’,
styleUrls: [‘./app.component.css’],
animations: [
trigger(‘slideInOut’, [
state(‘in’, style({
transform: ‘translate3d(0, 0, 0)’
})),
state(‘out’, style({
transform: ‘translate3d(-100%, 0, 0)’
})),
transition(‘in => out’, animate(‘400ms ease-in-out’)),
transition(‘out => in’, animate(‘400ms ease-in-out’))
]),
]
})
export class AppComponent {
title = ‘app works!’;
toggleMenu() {
}
}
Thanks.Its working for me in angular4.But how to hide toggle button from login and register page.